How to set up monday.com with your MediaValet Library
Here is the step-by-step guide to setting up monday.com with your MediaValet DAM.
Required permissions:
To use this application, you need a MediaValet account. If you don’t have an account, you can sign up for a trial account here.
To set up this integration, a MediaValet administrator must connect the account and select a category to push assets. A user needs a valid MediaValet user account to use this integration. The MediaValet administrator will be required to grant the following permissions in monday.com to use this integration:
- Read all of your board’s data
Required to read the column values for the integration, such as title, description, file name and attribute value, to add to the file when uploading to MediaValet. - Modify any of your board’s data
Updating the status and date columns when uploading the asset to MediaValet is required. - Read information on files that were uploaded to your account
You must access your files from the file column to upload them to MediaValet. - Post of edit updates on your behalf
Required for you to receive notifications in the item view. These include notifications if there is an error during upload or to confirm your file has been successfully uploaded to MediaValet. - Read your user profile information
You must map your Monday account to your MediaValet account so that the data flowing between Monday and MediaValet is tagged to your account.
To get started:
1. Launch the Monday marketplace by clicking on the small puzzle icon at the top of your dashboard and searching for MediaValet. Then, click on the MediaValet app to launch and install its main page.
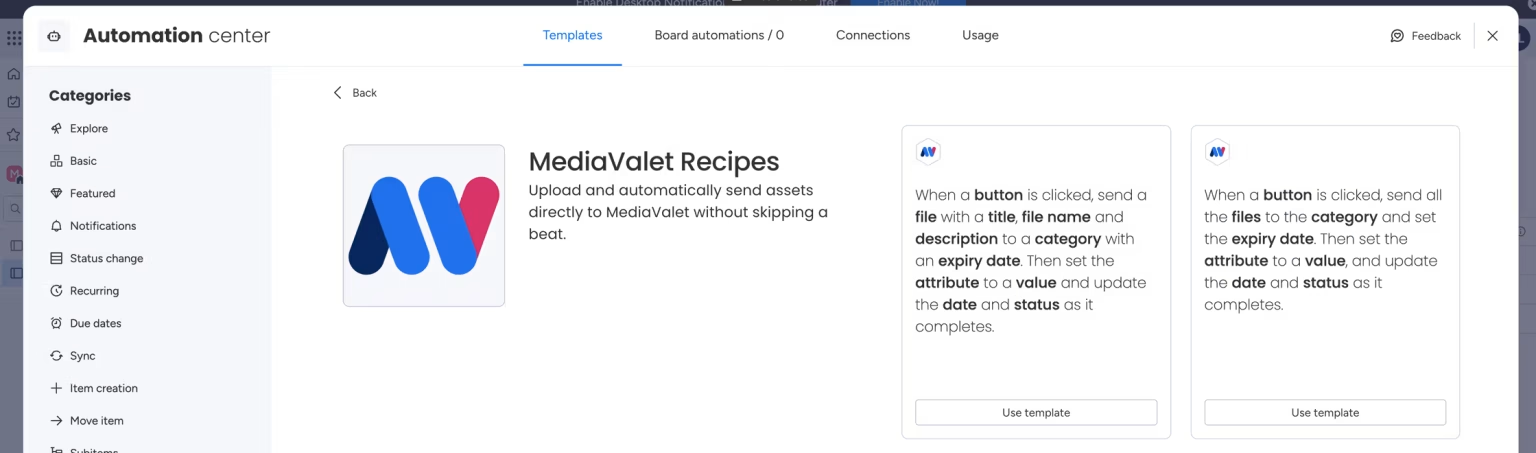
2. Click on Automate and search for “MediaValet” in the Automation Center. Click on MediaValet Recipes and select the template you want to use for automation.
3. You will be prompted to authorize this application. Click Authorize and login to your MediaValet account.
4. Once the integration has been authenticated with your MediaValet account, complete the recipe with the following values and click Add to Board. The integration and recipe will then be available for other users.
Note: We recommend you create a separate MediaValet user account to authenticate the integration, as all assets will be uploaded on behalf of this user account.
Recipe Values:
- Button: Used to initiate the automation to upload the asset to MediaValet.
- File: The most recent file in this column will be uploaded to MediaValet.
- Title: Title of the asset uploaded toMediaValet.
- File Name: File name of the asset uploaded toMediaValet.
- Description: The description of the asset uploaded to MediaValet.
- Category: The ID of the category to which the uploaded will be uploaded. Navigate to the category in MediaValet where you want the assets to be uploaded. The category ID can be pulled from the MediaValet URL of the specific category you’d like to use.
- Attribute: Name of the attribute that will be used in MediaValet. This will store the data from the Value field to the attribute. For example, if you enter “Job Id”, it will create a “Job Id” attribute in MediaValet and save the data in the Value column to that attribute when the asset is uploaded.
- Value: Name the column that contains the attribute’s value you want to associate with the asset. For example, if you have a column for Job ID with a value of “ID12345”, this will be saved as the value of the Job Id attribute of the asset in MediaValet. This attribute value can be searched in MediaValet to help you locate specific assets faster. This value does not have to be unique.
- Status: Name of the column that contains the status. This column can be used specifically for MediaValet uploads or the rest of your workflow.

Linking a MediaValet asset to an item:
- Click on the Item where you want to add a link to a MediaValet asset. The Item View panel will show up. Select the name of the column where you what to add the link to and click “Sign in” if you are prompted.
- Browse assets, navigate to a category and select an asset that you want to link with the item. Click the asset. A link to MediaValet will be added to the column you selected.
